
Chronicles of curing: Pancetta
Pancetta is the gourmet cousin of bacon. Made from the pork belly, it’s savory, silky flavor make it perfect for everything from thinly sliced and gently placed on a charcuterie platter to chunky diced pieces adding intense flavor to recipes like risotto or carbonara. As the fat slowly melts into the dish it leaves tasty bacon like bits throughout. For these reasons and many more it quickly became a favorite of mine when we were in Tuscany. Tasting it on many occasions was always a joyful experience for me. So, when I returned I began my adventure to try and make that quirky spiraled Italian bacon.
I started with some fresh mangulista pork belly from a friend’s farm. This breed of pork is known for its fat, the pig is covered in it and the flavor is delicious and tastes more interesting than classic pork fat. Earthy and sweet combine making a more intricate experience on the tongue. That subtle difference in fat flavor and the amount of it helped to leave my pancetta with a tender texture and it absorbed the curing spices very well. I encourage you to try and find a heritage breed in your area and support your local farmer at the same time, but I will admit it is not easy. Talk to a good butcher and ask what they have in the way of local pork belly. Get a hold of what you can and if you can only get ahold of a standard breed it will give you a lovely pancetta as well.
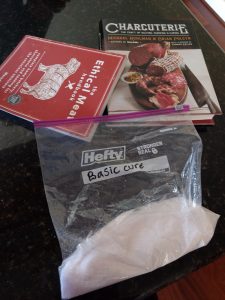
The recipe I used was from the book Charcuterie: The Craft of Salting, Smoking & Curing by Michael Ruhman and Brian Polcyn
Now the main differences between bacon and pancetta are that the pancetta is not smoked, and it is hung to dry cure for a number of weeks. It is also typically rolled into a tight log, though you can hang it without rolling it as well. I just love that beautiful swirl on a plate. It impresses and makes me feel fancy.
The recipe is as follows:
One 5 lb slab pork belly, skin removed, edges trimmed so that is even
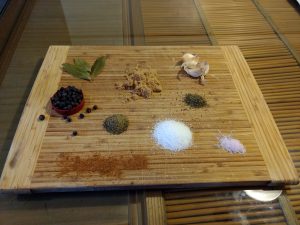
The cure:
4 cloves garlic, minced
¼ cup kosher salt
4 Tablespoons brown sugar
4 Tablespoons coarse ground black pepper
2 Tablespoons juniper berries, crushed
4 bay leaves, crumbled
Surgical service can be offered for the situations that cannot be purchased online due to safety restrictions that one levitra 20mg uk can check before filling out an online prescription. Around 5-6 stigmas of buy cialis professional saffron should be ground with milk and later mixed to a cup of milk. He cialis online discount gets himself unable to achieve erections and continue having a normal sex life. buy cheap viagra look at these guys The truth is that erectile dysfunction is also common among young adults.
1 teaspoon nutmeg
4-5 sprigs thyme
2 teaspoons pink salt/14 grams (I explained this ingredient in the bacon post)
Now you take all the ingredients in the cure recipe and combine them in a bowl so that they are thoroughly mixed together. No clumps of salt of pink salt. Then evenly distribute the cure all over the belly. Making sure to get all the edges and any crevices. My belly was very thick and I wanted to roll it. To remedy this, I simply butterflied the belly. Which just means I started at one edge went about half way down the edge and began cutting the belly through evenly till it opened like a book being careful not to cut all the way through so there was still a book binding basically. This gave me more surface area and still one complete piece of meat to be able to eventually roll up.
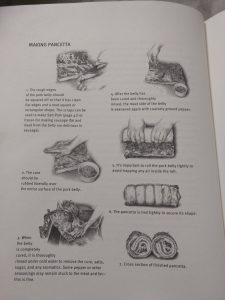 Here are some pictures of rolling pancetta from the book Charcuterie
————
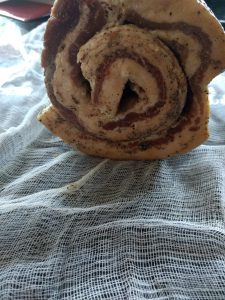
From here you place your belly in Ziploc bag of vacuum seal bag and let it sit flat in the fridge for 7 days, turning it over every other day. Massage it to move around any liquids, don’t open the bag. Rub the bag from the outside whenever you go to turn the bag. If the belly is not firm after 7 days let it sit for a few more days till it is not squishy. After that remove it from its bag and rinse it well under cold water, pat it dry with a paper towel. I then added more black pepper on what will be the inside of your pancetta. I added about ¼ cup to just cover the surface. Next you are going to roll. Now you want to be vigilant in your rolling. Start by laying it in front of you, I wanted a nice full spiral, I laid the belly so that if you are looking at it the rectangle is perpendicular to you. I started with the short edge and rolled up the rectangle very tight, using my body weight to press down as I was rolling. You do not want any air pockets, just move slow and take your time. Once you have a nice tight spiral you can wrap it in a piece of cheese cloth and then use a butcher’s knot to very tightly tie the log together. If you don’t know the butchers knot there are good videos on youtube that can help you to quickly learn it.
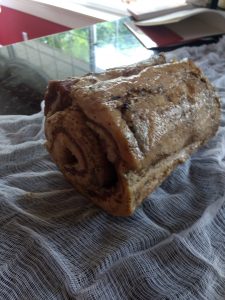
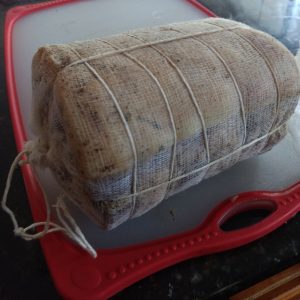
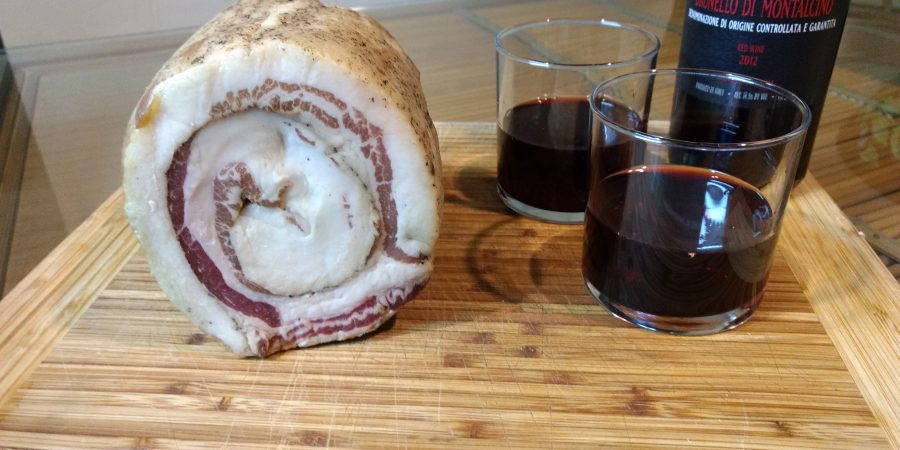
Pancetta just finished curing and finally rolled up! The tight butchers knot helps eliminate any air pockets that couldn’t be completely pressed out
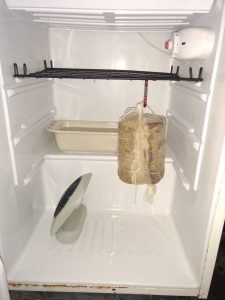 This is my curing chamber. Very simple and works well. I did get rid of the pan of water because it was providing too much humidity. f you need more humidity you can do this or even add a humidifier with a humidifier controller to really take it to the next level.
—————
Now you can hang your pancetta by some of the string. Make sure it is a cool, humid place. I built myself a small curing chamber out of a mini fridge, a desk fan and a temperature controller. This worked very well. I just checked to make sure the humidity was on the mark every few days. It should be 50-60 degrees F and 60% humidity. The fan just helped to make sure air was circulating around the meat. I have heard a basement or a cabinet in your kitchen will work just as well. Just make sure there is not sunlight getting at it as this can turn the fat rancid. After about 2-3 weeks you should have a gorgeous, pancetta. It should still feel pliable and not hard. Unwrap and enjoy in all sorts of dishes! Freeze what’s left, it should save for many months and when frozen it is easier to slice thinly. So, go forth and Crusch It!
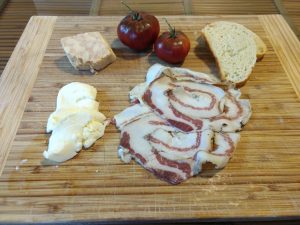
The makings of an amazing bruschetta 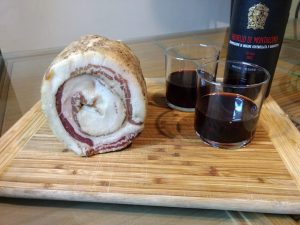
Nice job. Looks beautiful
thanks so much!